

The Google Home Mini (including the 2nd generation, known as the Nest Mini) is a compact smart speaker powered by Google Assistant. It lets you control smart devices, ask questions, set reminders, stream music, and more using just your voice.
Its affordable price, small footprint, and ease of use make it a popular choice for those building their first smart home or adding voice control to more rooms. Setting up the device is simple and quick, even if you are not particularly tech-savvy.
This guide is perfect for:
- First-time smart home users
- Anyone uncomfortable with tech setups
- Users adding a second or third device to their home
Step 1: What You Need Before You Begin
Before diving into setup, make sure you have the following:
- Google Home Mini or Nest Mini (either generation will work)
- A smartphone or tablet (iOS or Android)
- A stable Wi-Fi connection
- The Google Home app installed from the App Store or Google Play
- A Google account (e.g., Gmail)
- Optional: Smart home devices you plan to control through the Mini (smart bulbs, plugs, etc.)
Once everything is ready, you can move on to connecting and configuring your device.
Let me know when you’re ready for the next sections covering step-by-step setup, voice assistant configuration, troubleshooting, and more.
Step 2: Unboxing and Placement Tips
When you open your Google Home Mini or Nest Mini, you will typically find:
- The Google Home Mini/Nest Mini device
- A power adapter with a cable
- A quick-start guide
Best Placement Options
Choose a location where your device can hear you clearly and respond without obstructions. Common areas include the living room, kitchen, or bedroom. These are ideal because they combine high utility with central placement for voice commands.
Things to Consider:
- Sound quality: Flat, open surfaces help audio project better. Avoid placing it on soft materials like cushions or towels that can muffle sound.
- Microphone pickup: Place it within a clear line of sight for your voice—avoid tucking it behind decor or in enclosed shelves.
- Power access: Make sure it is near a power outlet, as the device must remain plugged in to function.
Avoid placing it:
- Near TVs or speakers, which can confuse the microphone
- Close to microwaves or thick walls, which may cause wireless interference
Step 3: Plug It In: Powering Your Google Home Mini
Connecting the Power
Insert the power cable into the port on the back of your Google Home Mini. Then plug the adapter into a nearby outlet. There is no power button—it will automatically turn on once plugged in.
Light Ring Indicators
- Flashing white lights: Booting up
- Spinning white or multi-colored lights: Connecting or updating
- Solid lights: Ready for setup or listening
Boot-Up Process
The device takes a few moments to start up. You will hear a chime or greeting once it is ready to begin setup.
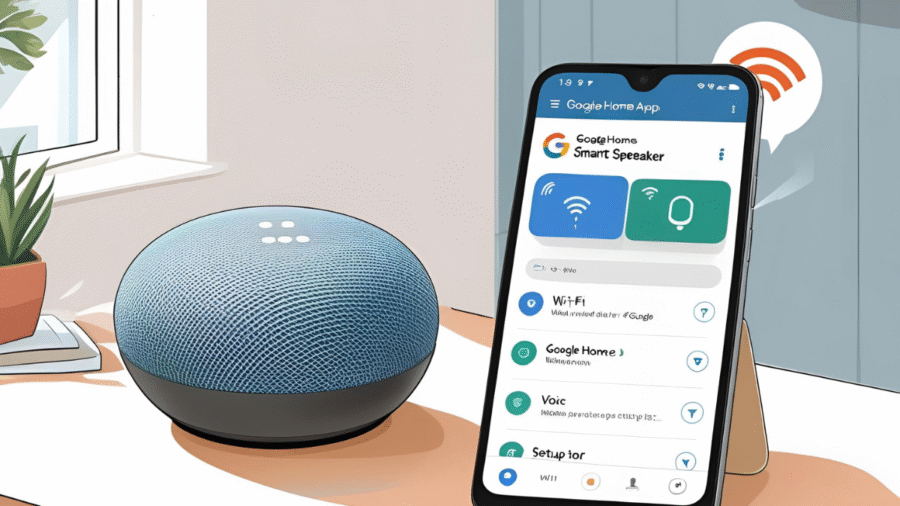
Step 4: Downloading and Setting Up the Google Home App
To begin setup, download the Google Home app on your smartphone or tablet.
Download links:
- Google Play Store (for Android)
- Apple App Store (for iOS)
Sign In
Log in with the Google account you want to associate with the device.
Permissions to Enable:
- Bluetooth: Required for initial connection to the Mini
- Location access: Helps assign a physical address for services like weather and local businesses
- Wi-Fi access: For network configuration
Once you accept the permissions and terms of service, you will proceed to link your device to your home Wi-Fi and assign it a room.
Let me know when you’re ready for the next steps on connecting to Wi-Fi, customizing settings, and using Google Assistant features.
Step 5: Connecting to Google Home Mini via the App
Once the Google Home app is open and your device is plugged in:
Automatic Detection
The app should display a prompt that says a new device has been found nearby. Tap “Yes” or “Set up” to begin.
If It Does Not Detect Automatically
- Ensure Bluetooth is enabled on your phone
- Make sure the Mini is powered on and displaying its LED lights
- Tap the “+” icon, then go to Set up device > New device, and follow the on-screen instructions
Sound Confirmation Step
The Mini will play a short chime to confirm it’s the device you’re setting up. If you hear the sound, tap “Yes” in the app.
Assigning a Room Name
Choose a room label like “Living Room,” “Kitchen,” or “Office.” This helps with device organization, especially if you plan to use multiple smart devices later.
Step 6: Connecting Google Home Mini to Wi-Fi
Choose a Wi-Fi Network
The app will list nearby networks. Select the one you want your Mini to connect to.
Enter the Wi-Fi Password
Double-check for typos, this is a common step where many people get stuck.
If You Encounter Wi-Fi Issues:
- Weak Signal: Try moving the Mini closer to the router temporarily
- Authentication Errors: Recheck your password or restart your router
- Cannot connect: Reset your Mini and start the setup process again
Using Dual-Band Routers
- 2.4GHz: Offers broader coverage, better for devices far from the router
- 5GHz: Faster speeds, ideal for close-range use in the same room
Step 7: Linking Your Google Account and Voice Match Setup
Google Account Linking
Ensure you log in with the Google account you use for Gmail, Calendar, YouTube, and other services. This ensures the Mini provides personalized responses.
Set Up Voice Match
This feature helps the device recognize your voice and respond with your information, like reminders, calendar events, or commute times.
Adding Multiple Users
Tap “Invite others” within the app to let friends or family create their own voice profiles. Each user can enjoy a personalized experience.
Privacy Tips
- Voice recordings are stored in your Google account settings
- You can delete them anytime or limit what gets saved via your account’s activity controls
- Review the privacy settings under “Assistant settings” in the Google Home app
Step 8: Configuring Basic Settings
Once your Mini is connected and linked to your account, it is time to customize your experience through basic settings:
Language Preferences
You can choose or add supported languages such as English, Spanish, or French. This helps the assistant better understand and respond to your commands.
Music & Video Services
In the Google Home app, go to Settings > Music to link your preferred streaming services like Spotify, YouTube Music, or Pandora. For video services like Netflix or YouTube, go to Settings > Video and connect your accounts.
Calendar & Email Integration
To manage your day using voice commands, link your Google Calendar and Gmail. The assistant can read events, reminders, and even send quick emails if allowed.
Routines
Automate daily tasks by setting up routines. For example:
- “Good Morning” can read the weather, news, and commute info.
- “Bedtime” can dim the lights and play sleep sounds.
Volume & LED Adjustments
Change volume using the app or by touching the Mini. You can also adjust LED brightness under Accessibility settings and tweak voice feedback settings for a more comfortable experience.
Step 9: Adding Smart Home Devices
Compatible Smart Devices
Google Home Mini supports a wide range of smart products: smart lights (like Philips Hue), plugs (TP-Link, Kasa), thermostats (Nest), cameras, doorbells, and more.
How to Connect Devices
- In the app, tap the “+” icon
- Select Set up device > Works with Google
- Choose your device brand and follow the linking process
Creating Rooms and Groups
Assign devices to rooms (e.g., Kitchen, Bedroom) for easier control. You can also group devices (like multiple lights) to control them together with a single command.
Smart Commands to Try
- “Hey Google, turn off the living room lights.”
- “Set thermostat to 72 degrees.”
- “Is the front door locked?”
Automation Examples
- “Hey Google, good night” could turn off lights, lower the thermostat, and play white noise
- “Hey Google, movie time” could dim lights and open Netflix
Step 10: Using Your Google Home Mini After Setup
Now that everything is configured, enjoy using your Mini for everyday tasks:
Basic Voice Commands
- “Hey Google, what’s the weather today?”
- “Set a timer for 10 minutes.”
- “Play relaxing music.”
- “What’s on my calendar?”
Google Services Integration
Your Mini syncs with Google Calendar, Maps, Gmail, and more, allowing you to get directions, reminders, and traffic updates hands-free.
Communication Features
With Google Duo, you can make voice calls or send messages—just say:
- “Hey Google, call Mom.”
- “Send a message to Alex.”
Fun & Daily Use
You can play games, hear jokes, get trivia, or start a daily routine with:
- “Let’s play a game.”
- “Tell me something good.”
- “Start my day.”
Step 11: Troubleshooting Setup Issues
Even with a user-friendly device like the Google Home Mini, setup issues may occasionally arise. Here’s how to address the most common ones:
Mini Not Connecting to Wi-Fi
- Ensure you’re entering the correct Wi-Fi password.
- Try moving the Mini closer to your router.
- Restart your router and the device.
- Avoid connecting to captive portals (like hotel Wi-Fi).
Device Not Showing in Google Home App
- Enable Bluetooth and Location Services on your phone.
- Check that both devices are on the same Wi-Fi network.
- Force-close and reopen the Google Home app.
Voice Match Not Working
- Ensure the correct Google account is linked.
- Re-record your voice model: Google Home App > Settings > Assistant > Voice Match.
- Make sure your mic is not muted.
Resetting Your Google Home Mini
If all else fails, a reset may help.
Manual Reset Process:
- For 1st Gen Mini: Press and hold the factory reset button on the bottom for ~15 seconds until you hear a chime.
- For Nest Mini (2nd Gen): Turn off the mic, then press and hold the center of the top for ~15 seconds.
Soft Reset vs. Factory Reset:
- Soft Reset: Simply unplug the device and plug it back in.
- Factory Reset: Erases all settings and returns the device to its original state.
Need More Help?
Contact Google Nest Support or visit the community forums for personalized guidance.
Step 12: Tips for a Better Experience
Maximize the performance and convenience of your Mini with these expert tips:
Best Placement for Mic Pickup
Place your device at waist or chest height, away from noisy appliances (TV, fans, microwaves). Keep it clear of obstructions.
Use Multiple Minis Across the House
Add devices in different rooms for seamless voice command coverage, intercom functionality, and individual routines per room.
Create Speaker Groups
For multi-room audio, create speaker groups in the app and play synchronized music throughout your home:
- App > Devices > Group > Select devices > Name your group (e.g., “All Speakers”)
Privacy and Control
- Use the physical mic mute button to disable listening.
- Manage activity: Google Account > Data & Privacy > Activity Controls
- Regularly review voice recordings and delete as needed.
Stay Updated
Google Home Mini receives automatic updates, but to check:
- Open app > Device Settings > Scroll to see firmware version
- Reboot if it has not been updated in a while
Step 13: Upgrading or Replacing Your Google Home Mini
If you’re considering an upgrade, here’s what to know:
Google Home Mini vs. Nest Mini
- Nest Mini offers better sound, wall-mounting capability, and improved voice recognition.
- It also includes an additional mic and machine learning chip for faster responses.
Transferring Settings to a New Device
When setting up a new device:
- Log into the same Google account
- Use the same room/group names
- Re-link your smart devices and routines
Repurpose Old Devices
Place your old Mini in a secondary room like the bathroom, garage, or office for background music, reminders, or intercom use.
Recycling Responsibly
- Visit g.co/Homemini/recycle or local electronics drop-off locations
- Remove your account from the old device before disposing of it
Frequently Asked Questions (FAQs)
Can I use Google Home Mini without a smartphone?
No, setup requires the Google Home app on a smartphone or tablet. Once setup is complete, you can interact with the Mini using voice commands.
Do I need a Google account to use Google Home Mini?
Yes, a Google account is required to complete the setup process and enable features like personalized responses, calendar syncing, and routines.
How do I reset my Google Home Mini to factory settings?
Press and hold the small reset button located beneath the power cord for approximately 15 seconds. You will hear a chime when the reset is complete.
Can multiple people use the same Google Home Mini?
Yes, with Voice Match enabled, each user can connect their own Google account and receive personalized information like schedules, reminders, and playlists.
Does Google Home Mini work without Wi-Fi?
No, it requires an active Wi-Fi connection to process voice commands, stream music, control smart devices, and access the internet.
Can I connect my Google Home Mini to a Bluetooth speaker?
Yes, the Google Home app allows you to pair an external Bluetooth speaker for enhanced sound output. Navigate to the device settings and select your default speaker.
How do I update the Google Home Mini firmware?
Updates are installed automatically when the device is idle and connected to Wi-Fi. To check update status, open the Google Home app and tap on the device settings.
Conclusion
Setting up your Google Home Mini can be quick and rewarding when done with the right steps. This guide has walked you through unboxing, app setup, Wi-Fi configuration, and smart home integration. Now you’re ready to explore more.
Final Checklist for Proper Setup:
- Google Home Mini plugged in and powered
- Google Home app installed on your mobile device
- Connected to a working Wi-Fi network
- Linked to your Google account
- Voice Match configured (if desired)
- Basic settings like language, music, and routines completed
- Smart devices added and tested
- Privacy settings reviewed
Explore More Smart Home Features
Google Home Mini is more than a speaker. Try integrating with:
- Smart lights (Philips Hue, Wyze)
- Smart plugs (TP-Link, Kasa)
- Thermostats (Nest, Ecobee)
- Cameras, locks, and more
You can also create automated routines, broadcast messages, or play multi-room music across speaker groups.
Add a Comment